Integrating Auth0 into your Angular applications
Auth0 provides SDK for Angular to authenticate users and simply authorize users to access the protected APIs .

In this post, we will create a simple Angular SPA application and try to access the Backend API we have created in the last post.
Firstly lets create a new application in the Auth0 management console. An application presents an OAuth2 Client role , each client should have a unique client id to identify it.
In the dashboard UI, expand Applications/applications in the left pane. Click the Create Application button to start up the creating progress.
- In the application name, set a name for this new Angular application, eg. I used spa here.
- Then select the Single page applications.
- Click the Create button.
After it is created, open the Settings page, you will find a Client ID and Client Secrets are generated in the page. In the Application URLs section, add http://localhost:4200 to the following fields.
- Allowed Callback URLs
- Allowed Logout URLs
- Allowed Web Origins
- Allowed Origins (CORS)
In the Quickstarts tab, Auth0 provides a series of tutorials to integrate Auth0 with the popular SPA framework, including Angular/React/Vue, etc.
I followed the official Angular Quickstart tutorial, but I refactored the project file structure according to the Angular Coding Style Guide, and ported the existing codes from hantsy/angular-spring-reactive-sample to simplify the development work. The final source codes can be found under my Github account.
More details about creating this sample application step by step, please read the official Angular Quickstart tutorial.
For the implementation details of accessing Backend APIs, check this article I have published on Medium and this old Angular2 sample codes.
Here we are going to introduce the details of integrating Auth0 Angular SDK.
Install Auth0 Angular SDK.
$ npm i @auth0/auth0-angular
Auth0 Angular SDK provides a series of authentication related facilities out of box, including AuthModule, AuthService , AuthGuard and AuthHttpInterceptor . We have built those components from scratch in the hantsy/angular-spring-reactive-sample.
Configure AuthModule and AuthHttpInterceptor in the app.module.ts.
// Import the module from the SDK
import { AuthHttpInterceptor, AuthModule } from '@auth0/auth0-angular';
@NgModule({
  declarations: [AppComponent],
  imports: [
    BrowserModule,
    BrowserAnimationsModule,
    CoreModule,
    SharedModule,
    // Import the module into the application, with configuration
    AuthModule.forRoot({
      domain: 'dev-ese8241b.us.auth0.com',
      clientId: 'xwulkQN219vK2LU9MKowCo0HQLRi0WQU',
      audience: 'https://hantsy.github.io/api',
      scope: 'openid profile email read:posts write:posts delete:posts',
      // The AuthHttpInterceptor configuration
      httpInterceptor: {
        allowedList: [
          '/api/*',
        ],
      },
    }),
    HomeModule,
    AppRoutingModule,
  ],
  providers: [
    {
      provide: HTTP_INTERCEPTORS,
      useClass: AuthHttpInterceptor,
      multi: true,
    },
  ],
  bootstrap: [AppComponent],
})
export class AppModule {}
Let’s have a look at the content of AppRoutingModule. In the path of profile module and admin module, add a AuthGuard to ensure the current user is authenticated.
import { AuthGuard } from '@auth0/auth0-angular';
//...
const routes: Routes = [
{ path: '', redirectTo: '/home', pathMatch: 'full' },
{
path: 'profile',
loadChildren: () =>
import('./profile/profile.module').then((m) => m.ProfileModule),
canActivate: [AuthGuard],
},
{
path: 'posts',
loadChildren: () =>
import('./posts/posts.module').then((m) => m.PostsModule),
},
{
path: 'admin',
loadChildren: () =>
import('./admin/admin.module').then((m) => m.AdminModule),
canActivate: [AuthGuard],
},
//{ path: '**', component:PageNotFoundComponent}
];
@NgModule({
  imports: [RouterModule.forRoot(routes)],
  exports: [RouterModule],
})
export class AppRoutingModule {}
To show/hide the login and log out button, inject an AuthService and detect the authentication status via its isAuthenticated method.
export class AuthenticationButtonComponent implements OnInit {
  constructor(public auth: AuthService) {}
ngOnInit(): void {}
}The template file of AuthenticationButtonComponent.
<app-login-button *ngIf="(auth.isAuthenticated$ | async) === false">
</app-login-button>
<app-logout-button *ngIf="auth.isAuthenticated$ | async">
</app-logout-button>
To test the application, we have to add some testing users in Auth0(you can also use Signup form to register a user).
Go to Auth0 management console. Expand the Authentication/Databases in the left pane, we will use the default Username-Password-Authentication here, click the options button to open Settings page, make sure Requires Username is checked, I would like to use a username instead of email to login. Switch to Password Policy tab, make Password strength lower, it allows you to create simple passwords for your testing users. Switch to the Applications tab, make sure your application is activated there.
Let’s add some users now. Open User management/Users in the dashboard. Click Create User to start adding new users. Add the following new users(username/password/email), and assign permissions to them.
- user/password/user@example.com — read:posts, write:posts
- admin/password/admin@example.com — read:posts, write:posts, delete:posts
Go to the user details page of every users, under the email, mark the email as verified directly to avoid email verification.
Now back to your application, run the following command to start it.
$ npm run start
Click login button to show the Auth0 Login Form, input the user/password to login.
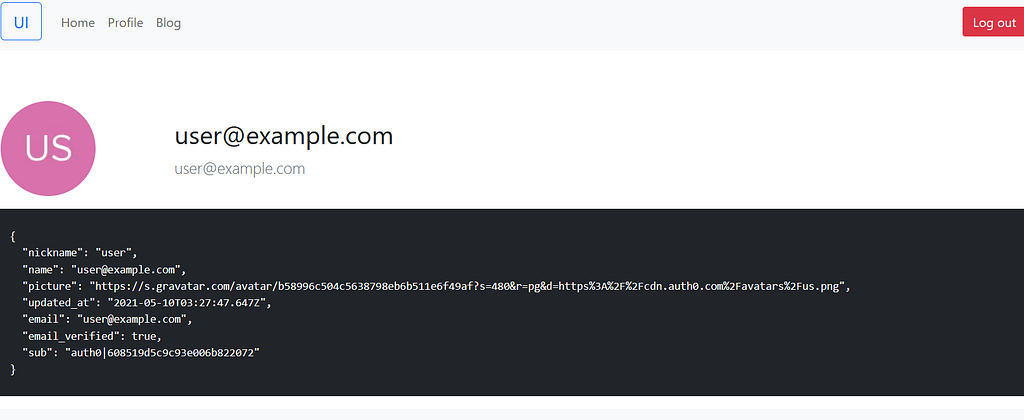
Navigate to the Profile page, you will see the screen similar to the following.

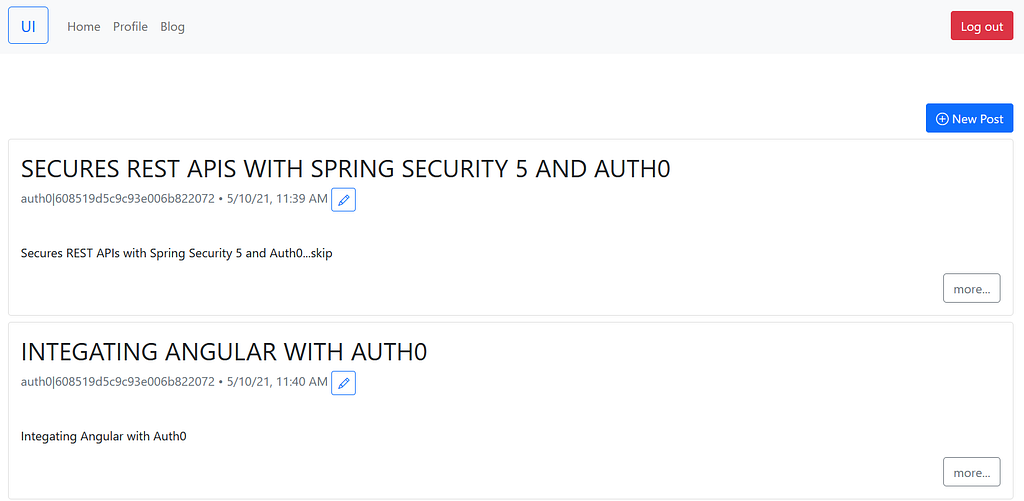
The blog accesses the Backend API we have created. To experience it, make sure the Backend API is running.

Try to log out, it should return to the http://localhost:4200.
Grab the source codes form my Github.
Integrating Auth0 into your Angular applications was originally published in ITNEXT on Medium, where people are continuing the conversation by highlighting and responding to this story.