Generate a Project Skeleton
Similar to Spring Initializr, Micronaut provides an online service named Launch to generate a project skeleton for you.
Alternatively, Micronaut provides a command line. You can use it to generate a new project from the existing templates.
Micronaut Launch
Open your browser, go to Micronaut Launch, you will see the following screen.
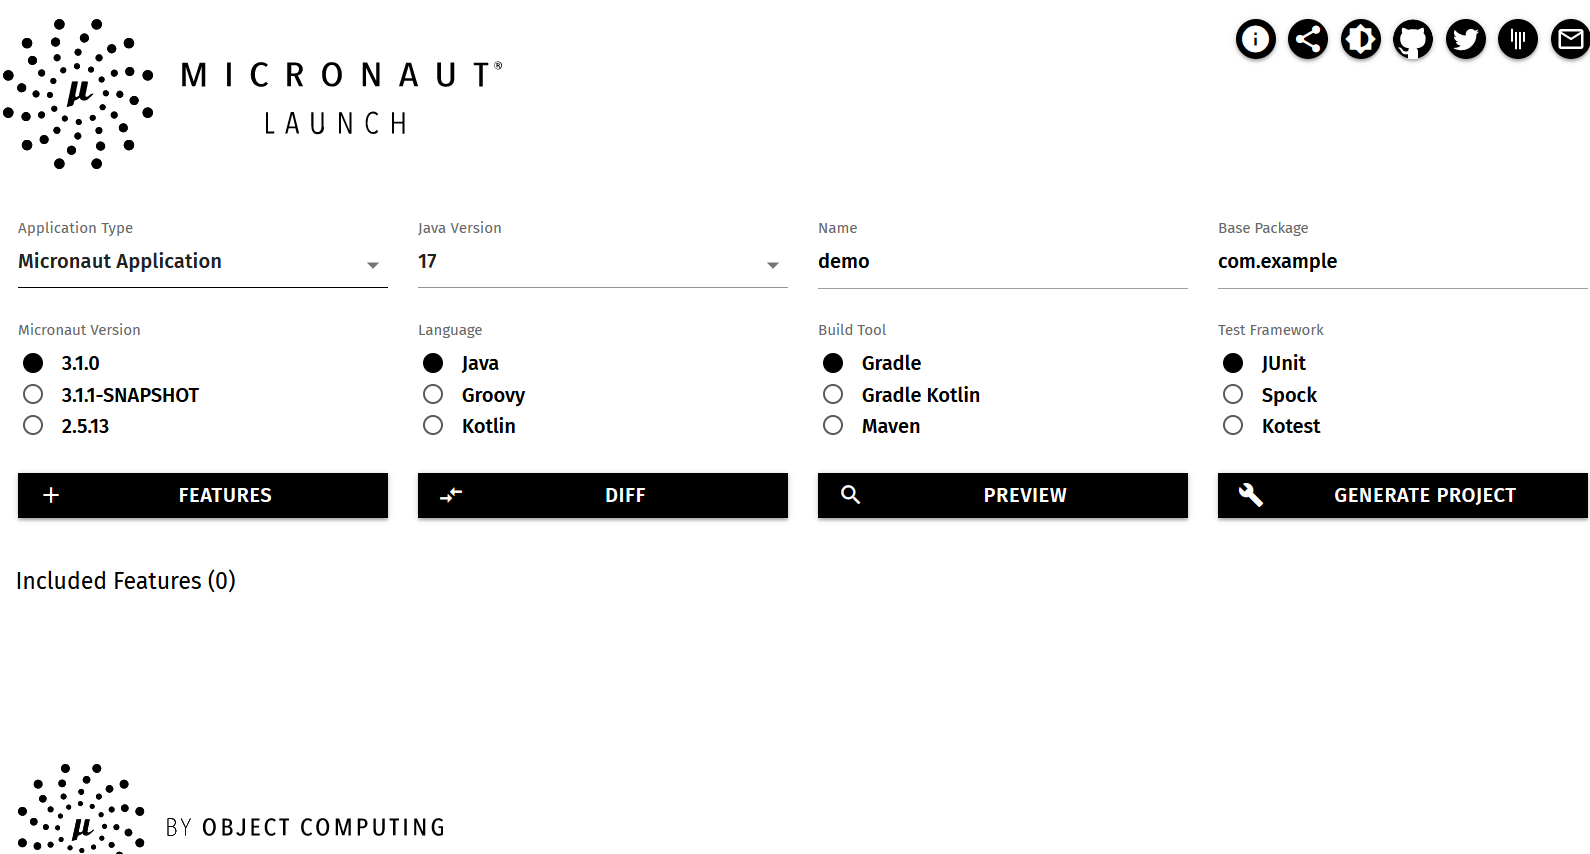
In the Application Type field, there are several options available in the dropdown menu, including Micronaut Application, Command Line Application, gRPC Application, Function Application for serverless, Message-Driven Application. For different purposes, you can choose one to generate the project skeleton. If you want to create a general web application, a RESTful API backend application, or a Microservice component, use the default Micronaut Application.
In the Java version field, it is highly recommended to choose the latest LTS version 17.
If you want to customize the application name (it is also the project artifact id) and base package name, alter the value in the Name and Package Name fields.
Next, select the Micronaut Version(for new project, the latest stable version is recommended) and your favorite programming Language(Java, Kotlin, Groovy), Build Tools(Maven, Gradle, Gradle with Kotlin Script) and Test framework(JUnit, Kotest, Spock).
Click the Features button, it will popup a new window. In the popup window, it lists all Micronaut integrated libraries/frameworks. Filter and select those you want to use to build the application.
Before downloading the generated archive, click the PREVIEW button to preview the file structure in a popup window.
Finally, hit the GENERATE PROJECT button to produce the project files into an archive for download.
Extract the project files from the download archive into your local disk, and import the files into your IDE.
Micronaut CLI
You can also create a Micronaut project using Micronaut CLI, check Micronaut documentation for details.
Under Windows system, to get Linux bash-like command experience, you can install Cygwin or enable WSL(Windows subsystem for Linux).
Firstly install SDKMan, which is a popular software management tool for developers.
Open your terminal, and run the following command to install SDKMan automatically.
$ curl -s "https://get.sdkman.io" | bash
After it is completed, run this command to initialize SDKMan configuration.
$ source "$HOME/.sdkman/bin/sdkman-init.sh"
Verify the SDKMan installation.
$ sdk version

SDKMAN 5.12.4
Next, install Micronaut CLI from the official SDKMan reposiory.
$ sdk install micronaut
After it is done, verify the installation.
$ mn -V
Micronaut Version: 3.1.0
Type mn --help command in the terminal to get all available options.
$mn --help
Usage: mn [-hvVx] [COMMAND]
Micronaut CLI command line interface for generating projects and services.
Application generation commands are:

*  create-app NAME
*  create-cli-app NAME
*  create-function-app NAME
*  create-grpc-app NAME
*  create-messaging-app NAME

Options:
  -h, --help         Show this help message and exit.
  -v, --verbose      Create verbose output.
  -V, --version      Print version information and exit.
  -x, --stacktrace   Show full stack trace when exceptions occur.

Commands:
  create-app            Creates an application
  create-cli-app        Creates a CLI application
  create-function-app   Creates a Cloud Function
  create-grpc-app       Creates a gRPC application
  create-messaging-app  Creates a messaging application
The Commands options are similar to the Application Type options in the Micronaut Lauch page.
Try to create a new project using the mn command.
$ mn create-app demo -b gradle -f lombok,postgres,data-jpa,hibernate-jpa,testcontainers -l java -t=junit

| Application created at C:\tools\cygwin\home\hantsy\demo
The project files are generated into the demo folder under current path. The file structure is similar to the one generated by the Micronaut Launch page.
You can use mn create-app --help to get the option details of the create-app command.
Exploring project structure
Let's have a look at the files in the project.
.
├── build.gradle
├── gradle
│   └── wrapper
│       ├── gradle-wrapper.jar
│       └── gradle-wrapper.properties
├── gradle.properties
├── gradlew
├── gradlew.bat
├── micronaut-cli.yml
├── settings.gradle
└── src
    ├── main
    │   ├── java
    │   │   └── com
    │   │       └── example
    │   │           └── Application.java
    │   └── resources
    │       ├── application.yml
    │       └── logback.xml
    └── test
        ├── java
        │   └── com
        │       └── example
        │           └── DemoTest.java
        └── resources
            ├── application-test.yml
            └── logback-test.xml
Besides Gradle build scripts related resources, it is similar to the Spring Boot project structure.
- The
Applicationis the entry class of the application. - The src/main/resources/application.yml is the application configuration.
- The src/main/resources/logback.xml is logging configuration, by default Micronaut uses Logback as logging framework.
- The
DemoTestis an test example of using@MicronautTest. - Under the src/test/resources folder, there are some configuration resources for testing.
Let's have a look at build.gradle.
It uses com.github.johnrengelman.shadow to package the application into a jar archive.
The io.micronaut.application plugin handles the dependency injection at compile time via Java Compiler Annotation Processors. This plugin also includes other tasks, such building application into Docker image and GraalVM native executable binary.