Create a WebFlux application with Spring Boot
The Spring Boot 2.x targets the latest Spring technology stack, including Spring 5, Spring Security 5, Spring Session 2, etc.
Spring Boot added a new starter spring-boot-starter-webflux for starting a WebFlux application.
Generate project skeleton
Follow the following steps to prepare the project skeleton using Spring initializr.
Open your browser and navigate to http://start.spring.io.
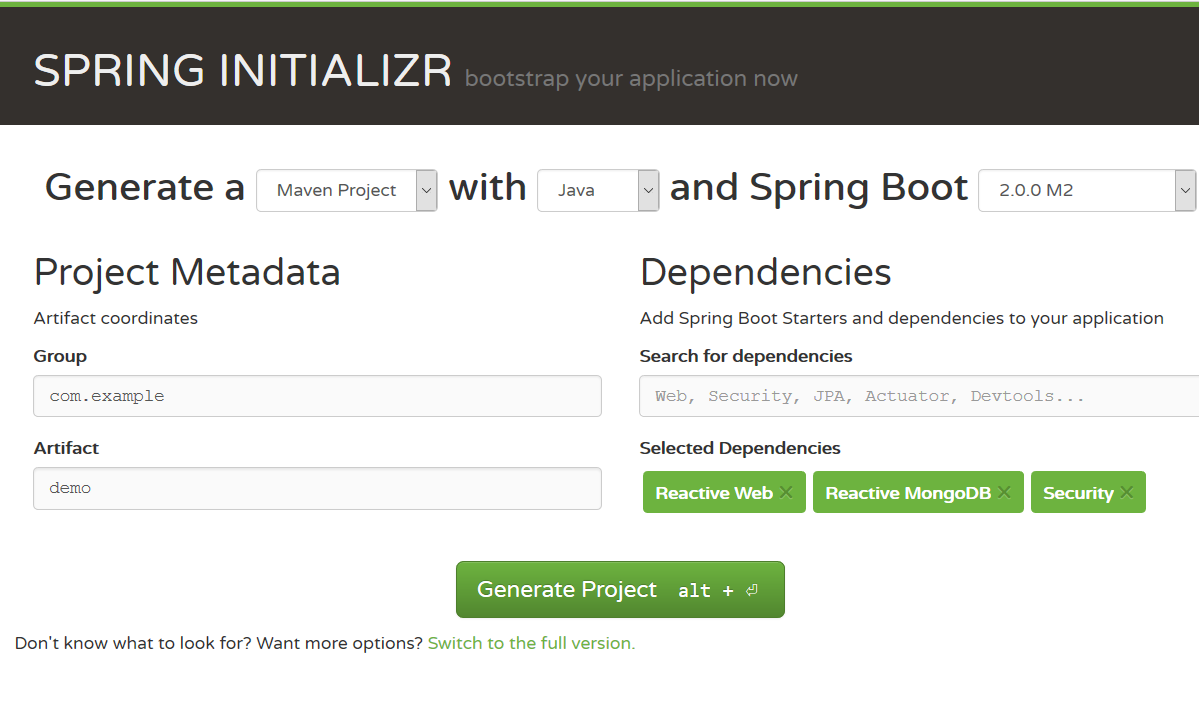
In the Spring Boot Initializr page, fill the following fields.
- Select the latest stable Spring Boot version, eg. 2.4.3 at the moment.
- In the dependencies box, type reactive, it will display all reactive options in a dropdown menu. Select Ractive Web to add
spring-boot-starter-webfluxinto project dependencies. You can also add other items as you like, such as Lombok, Reactive MongoDb, Reactive Redis etc. - Click Generate project button or use ALT+NETER shortcut to generate a project skeleton as a zip file for downloading.
Download the archive and extract files into your disc, import the source codes into your IDEs.
Open the pom.xml, you will see the spring-boot-starter-webflux is added into dependencies.
<dependency>
	<groupId>org.springframework.boot</groupId>
	<artifactId>spring-boot-starter-webflux</artifactId>
</dependency>
And a spring-boot-maven-plugin is added in the initial pom.xml.
Spring Boot starter spring-boot-starter-webflux will handle the spring-webflux related dependencies and enable WebFlux support automatically. It also add logback as default logging handler.
Compare to the former vanilla version,
- No need explicit
WebConfig, Spring Boot configures it automatically. - The former bootstraping class or
AppInitializeris no use now, the Spring Boot built-in@SpringBootApplicationannotated class hands over the applicationContext lifecyle and application bootstrap.
@SpringBootApplication
public class DemoApplication {

    public static void main(String[] args) {
        SpringApplication.run(DemoApplication.class, args);
    }
}
By default, Spring Boot will use Reactor Netty as runtime to run a WebFlux application. No need extra configuration for it.
To start the application in your terminal, run the following command in the project root folder.
mvn spring-boot:run
Alternatively, to start Spring Boot applications in your IDEs, run it just like running a general-purpose Java application.
Getting Started
As an exercise, try to add the similar codes with the former post to expose RESTful APIs for Post.
- Add a POJO
Post. - Add a dummy
PostRepository. - Add a simple
PostController.
Restart the application, and test the endpoints.
#curl http://localhost:8080/posts
...
Check the complete codes, spring-reactive-sample/boot.
Bootstrap
By default, when spring-boot-starter-webflux is included in the classpath, it uses Netty as the embedded server to serve HTTP requests.
It is easy to switch to other embedded servers.
Apache Tomcat
If you want to use Apache Tomcat as target runtime environment, just exclude spring-boot-starter-reactor-netty from spring-boot-starter-webflux, and add an extra dependency spring-boot-starter-tomcat into pom.xml.
<dependency>
	<groupId>org.springframework.boot</groupId>
	<artifactId>spring-boot-starter-webflux</artifactId>
	 <exclusions>
		<exclusion>
			<artifactId>spring-boot-starter-reactor-netty</artifactId>
			<groupId>org.springframework.boot</groupId>
		</exclusion>
	</exclusions>
</dependency>

<dependency>
	<groupId>org.springframework.boot</groupId>
	<artifactId>spring-boot-starter-tomcat</artifactId>
</dependency>
Check the sample codes, spring-reactive-sample/boot-tomcat.
Eclipse Jetty
To use Jetty to replace the default Reactor Netty.
<dependency>
	<groupId>org.springframework.security</groupId>
	<artifactId>spring-security-webflux</artifactId>
	 <exclusions>
		<exclusion>
			<artifactId>spring-boot-starter-reactor-netty</artifactId>
			<groupId>org.springframework.boot</groupId>
		</exclusion>
	</exclusions>
</dependency>

<dependency>
	<groupId>org.springframework.boot</groupId>
	<artifactId>spring-boot-starter-jetty</artifactId>
</dependency>
Check the sample codes, spring-reactive-sample/boot-jetty.
Undertow
Similiarly, you can use Undertow as target runtime.
<dependency>
	<groupId>org.springframework.boot</groupId>
	<artifactId>spring-boot-starter-webflux</artifactId>
	<exclusions>
		<exclusion>
			<artifactId>spring-boot-starter-reactor-netty</artifactId>
			<groupId>org.springframework.boot</groupId>
		</exclusion>
	</exclusions>
</dependency>

<dependency>
	<groupId>org.springframework.boot</groupId>
	<artifactId>spring-boot-starter-undertow</artifactId>
</dependency>
Check the sample codes, spring-reactive-sample/boot-undertow.