New Features and Improvements
Next let's explore the amazing new features introduced in Faces 4.0.
Extensionless Mapping
In the previous versions, FacesServlet is registered to handle mapping of <conext path>/myFacelets.xhtml, <context path>/faces/myFacelets, <context path>/myFacelets.faces.
In Faces 4.0, it allows to map a URI without extension, eg. <conext path>/myFacelets.
Create a Jakarta EE web project, add the following configuration in the src/webapp/web.xml file.
<context-param>
    <param-name>jakarta.faces.AUTOMATIC_EXTENSIONLESS_MAPPING</param-name>
    <param-value>true</param-value>
</context-param>
Add a simple CDI bean to activate Faces.
@FacesConfig()
@ApplicationScoped
public class FacesCdiActivator {
}
Note, the version attribute in annotation
@FacesConfigis deprecated since Faces 4.0.
Create a Facelets view src/webapp/hello.xhtml.
<!DOCTYPE html>
<html lang="en"
      xmlns="http://www.w3.org/1999/xhtml"
      xmlns:f="jakarta.faces.core"
      xmlns:jsf="jakarta.faces"
      xmlns:h="jakarta.faces.html">
<f:view>
    <h:head>
        <title>Hello, Faces 4.0!</title>
    </h:head>
    <h:body>
        <h1>Say Hello to Faces 4.0</h1>
        <h:form prependId="false">
            <label jsf:for="name" jsf:required="true">Enter your name:</label>
            <input type="text"
                   jsf:id="name"
                   jsf:value="#{hello.name}"
                   jsf:required="true"
                   jsf:requiredMessage="Name is required."
                   placeholder="Type your name here..."
            />
            <h:message for="name"/>
            <br/>
            <input type="submit" jsf:id="submit" value="Say Hello"  jsf:action="#{hello.createMessage()}">
                <f:ajax execute="@form" render="@form"/>
            </input>
            <br/>
            <p id="message">#{hello.message}</p>
        </h:form>
    </h:body>
</f:view>
</html>
And create a backing bean to process the submission.
@Named
@RequestScoped
public class Hello {
    private String name;
    private String message;

    public Hello() {
    }

    public void createMessage() {
        message = "Hello, " + name;
    }

    public String getName() {
        return name;
    }

    public void setName(String name) {
        this.name = name;
    }

    public String getMessage() {
        return message;
    }
}
Now execute the following command to run the applicaion on GlassFish.
> mvn clean package cargo:run
...
[INFO] Building war: D:\hantsylabs\jakartaee10-sandbox\faces\target\faces-examples.war
[INFO]
[INFO] --- cargo-maven3-plugin:1.10.10:run (default-cli) @ faces-examples ---
[INFO] [en3.ContainerRunMojo] Resolved container artifact org.codehaus.cargo:cargo-core-container-glassfish:jar:1.10.10 for container glassfish7x
[INFO] [talledLocalContainer] Parsed GlassFish version = [7.0.10]
[INFO] [talledLocalContainer] GlassFish 7.0.10 starting...
[INFO] [talledLocalContainer] Attempting to start cargo-domain.... Please look at the server log for more details.....
[INFO] [talledLocalContainer] GlassFish 7.0.10 started on port [8080]
[INFO] Press Ctrl-C to stop the container...
Open a web browser and navigate to http://localhost:8080/faces-examples/hello.
NOTE: Here we do not append any extension on the URL.
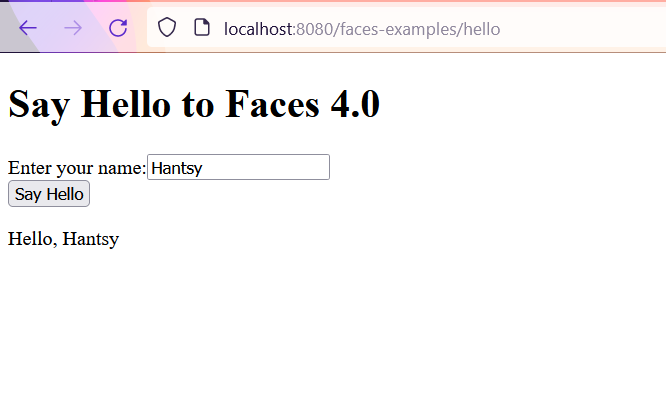
Input anything in the text input field and click the Say Hello button. You will see a greeting message displayed as the above image.
Composing Facelets View in Java Codes
In the previous version, Facelets view is a standard XHTML file. Since Faces 4.0, it is possible to compose a Faceslets view in pure Java codes.
The following is an example of writing Facelets view in Java.
@View("/hello-facelet.xhtml")
@ApplicationScoped
public class HelloFacelet extends Facelet {
    private static final Logger LOGGER = Logger.getLogger(HelloFacelet.class.getName());

    @Override
    public void apply(FacesContext facesContext, UIComponent root) throws IOException {
        if (!facesContext.getAttributes().containsKey(IS_BUILDING_INITIAL_STATE)) {
            return;
        }

        ComponentBuilder components = new ComponentBuilder(facesContext);
        List<UIComponent> rootChildren = root.getChildren();

        UIOutput output = new UIOutput();
        output.setValue("<html xmlns=\"http://www.w3.org/1999/xhtml\">");
        rootChildren.add(output);

        HtmlBody body = components.create(HtmlBody.COMPONENT_TYPE);
        rootChildren.add(body);

        var title = new UIOutput();
        title.setValue("<h1>Facelets View written in Java</h1>");
        body.getChildren().add(title);

        HtmlForm form = components.create(HtmlForm.COMPONENT_TYPE);
        form.setId("form");
        form.setPrependId(false);
        body.getChildren().add(form);

        HtmlOutputText message = components.create(HtmlOutputText.COMPONENT_TYPE);
        message.setId("message");
        //form.getChildren().add(message); // add to the bottom of form

        HtmlOutputLabel label = components.create(HtmlOutputLabel.COMPONENT_TYPE);
        label.setValue("Enter your name");
        form.getChildren().add(label);

        HtmlInputText name = components.create(HtmlInputText.COMPONENT_TYPE);
        name.setId("name");
        form.getChildren().add(name);

        HtmlCommandButton actionButton = components.create(HtmlCommandButton.COMPONENT_TYPE);
        actionButton.setId("button");
        actionButton.addActionListener(e -> {
                    LOGGER.log(Level.INFO, "local value: {0}", name.getLocalValue());
                    LOGGER.log(Level.INFO, "name value: {0}", name.getValue());
                    LOGGER.log(Level.INFO, "submitted value: {0}", name.getSubmittedValue());
                    var hello = "Hello," + name.getValue();
                    message.setValue(hello);
                }
        );
        actionButton.setValue("Say Hello");
        form.getChildren().add(actionButton);

        var br = new UIOutput();
        br.setValue("<br/>");
        form.getChildren().add(br);
        form.getChildren().add(message);

        output = new UIOutput();
        output.setValue("</html>");
        rootChildren.add(output);
    }

    private static class ComponentBuilder {
        FacesContext facesContext;

        ComponentBuilder(FacesContext facesContext) {
            this.facesContext = facesContext;
        }

        @SuppressWarnings("unchecked")
        <T> T create(String componentType) {
            return (T) facesContext.getApplication().createComponent(facesContext, componentType, null);
        }
    }
}
As you see, HelloFacelet view class is consist of the following facilities.
- Annotate with a
@Viewannotation to specify the view id - Extends
Faceletand implements optional methods, one for setup Faces metadata, one for assembling the view content. - Add a
@ApplicationScopedto declare it as CDI bean, thus means you can inject any CDI beans as you want in this class.
In the above HelloFacelet, in the submit button event listener, it reads the value from input component name, and set the greeting message to the value of message component directly.
Now build and run the application.
mvn clean package cargo:run
...
[INFO] --- cargo:1.10.10:run (default-cli) @ faces-examples ---
...
[INFO] [talledLocalContainer] GlassFish 7.0.10 started on port [8080]
[INFO] Press Ctrl-C to stop the container...
Now open a browser and navigate to http://localhost:8080/faces-examples/hello-facelet.xhtml.
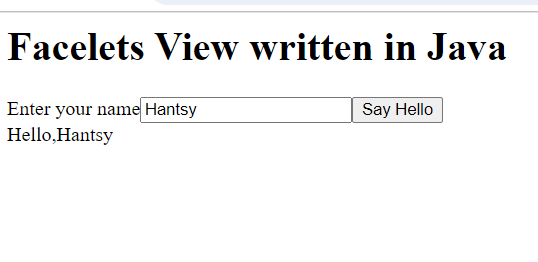
Input your name in the input box, and you will see the screen similar to the above image.
Alternatively, like regular XHTML Facelet view, we can use expression language to bind the input value and method in this Facelet view to a backend bean.
package com.example;
import jakarta.el.ELContext;
import jakarta.el.ExpressionFactory;
import jakarta.enterprise.context.ApplicationScoped;
import jakarta.faces.annotation.View;
import jakarta.faces.component.UIComponent;
import jakarta.faces.component.UIOutput;
import jakarta.faces.component.html.*;
import jakarta.faces.context.FacesContext;
import jakarta.faces.view.facelets.Facelet;
import jakarta.inject.Inject;
import java.io.IOException;
import java.util.List;
import java.util.logging.Logger;
import static jakarta.faces.application.StateManager.IS_BUILDING_INITIAL_STATE;
@View("/hello-facelet2.xhtml")
@ApplicationScoped
public class HelloFacelet2 extends Facelet {
private static final Logger LOGGER = Logger.getLogger(HelloFacelet2.class.getName());
@Inject
Hello hello;
@Override
public void apply(FacesContext facesContext, UIComponent root) throws IOException {
if (!facesContext.getAttributes().containsKey(IS_BUILDING_INITIAL_STATE)) {
return;
}
ELContext elContext = facesContext.getELContext();
ExpressionFactory expressionFactory = facesContext.getApplication().getExpressionFactory();
ComponentBuilder components = new ComponentBuilder(facesContext);
List<UIComponent> rootChildren = root.getChildren();
UIOutput output = new UIOutput();
output.setValue("<html xmlns=\"http://www.w3.org/1999/xhtml\">");
rootChildren.add(output);
HtmlBody body = components.create(HtmlBody.COMPONENT_TYPE);
rootChildren.add(body);
var title = new UIOutput();
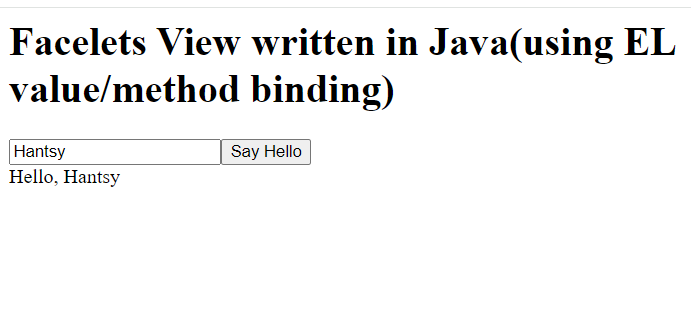
title.setValue("<h1>Facelets View written in Java(using EL value/method binding)</h1>");
body.getChildren().add(title);
HtmlForm form = components.create(HtmlForm.COMPONENT_TYPE);
form.setId("form");
form.setPrependId(false);
body.getChildren().add(form);
HtmlOutputText message = components.create(HtmlOutputText.COMPONENT_TYPE);
message.setId("message");
message.setValueExpression("value", expressionFactory.createValueExpression(elContext, "#{hello.message}", String.class));
//form.getChildren().add(message);
HtmlInputText name = components.create(HtmlInputText.COMPONENT_TYPE);
name.setId("name");
name.setValueExpression("value", expressionFactory.createValueExpression(elContext, "#{hello.name}", String.class));
form.getChildren().add(name);
HtmlCommandButton actionButton = components.create(HtmlCommandButton.COMPONENT_TYPE);
actionButton.setId("button");
actionButton.setActionExpression(expressionFactory.createMethodExpression(elContext, "#{hello.createMessage()}", Void.class, null));
actionButton.setValue("Say Hello");
form.getChildren().add(actionButton);
var br = new UIOutput();
br.setValue("<br/>");
form.getChildren().add(br);
form.getChildren().add(message);
output = new UIOutput();
output.setValue("</html>");
rootChildren.add(output);
}
private static class ComponentBuilder {
FacesContext facesContext;
ComponentBuilder(FacesContext facesContext) {
this.facesContext = facesContext;
}
@SuppressWarnings("unchecked")
<T> T create(String componentType) {
return (T) facesContext.getApplication().createComponent(facesContext, componentType, null);
}
}
}
Here, we bind the input component value to a value expression Hello.name, and bind submit event listener to a method expression hello.createMessage.
Rerun the application, navigate to http://localhost:8080/faces-examples/hello-facelet2.xhtml in your browser.
Input your name, you will see the screen similar to the following.
I try to access the Java Facelet view via the URL without an extension, it does not work, see Mojarra issue #5362.
New Scope: ClientWindowScoped
Faces 4.0 introduce a new CDI compatiable scope, a bean annotated with @ClientWindowScoped will be persist since the browser window/tab is open and will be destroyed till the window/tab is closed.
Add the jakarta.faces.CLIENT_WINDOW_MODE to enable ClientWindowScoped support. The value url means it will append a query param jfwid to identify the current window.
<context-param>
    <param-name>jakarta.faces.CLIENT_WINDOW_MODE</param-name>
    <param-value>url</param-value>
</context-param>
You can configure jakarta.faces.NUMBER_OF_CLIENT_WINDOWS to specify the maximum windows number that is allowed to create in a client.
<context-param>
    <param-name>jakarta.faces.NUMBER_OF_CLIENT_WINDOWS</param-name>
    <param-value>50</param-value> <!-- default is 10 -->
</context-param>
Let's create an example to experience.
@Named
@ClientWindowScoped
public class Chat implements Serializable {

    private static final Logger LOGGER = Logger.getLogger(Chat.class.getName());
    private List<String> messages;

    private String newMessage;

    public void send() {
        if(this.messages == null) {
            this.messages = new ArrayList<>();
        }

        var hello = newMessage +" at "+ LocalDateTime.now();
        this.messages.add(hello);

        LOGGER.log(Level.INFO, "current message list: {0}", this.messages);
        this.newMessage = null;
    }

    public List<String> getMessages() {
        return messages;
    }

    public void setMessages(List<String> messages) {
        this.messages = messages;
    }

    public String getNewMessage() {
        return newMessage;
    }

    public void setNewMessage(String newMessage) {
        this.newMessage = newMessage;
    }
}
In the above codes,
* The @Named allows the bean is accessed by name chat in the Facelet view.
* It is annotated with @ClientWindowScoped, and implements Serializable interface.
Let's have a look at the view /chat.xhtml.
<!DOCTYPE html>
<html lang="en"
      xmlns="http://www.w3.org/1999/xhtml"
      xmlns:f="jakarta.faces.core"
      xmlns:ui="jakarta.faces.facelets"
      xmlns:jsf="jakarta.faces"
      xmlns:h="jakarta.faces.html">
<f:view>
    <h:head>
        <title>Chat Box </title>
    </h:head>
    <h:body>
        <h1>Faces 4.0: Chat Box</h1>
        <h:form prependId="false">
            <label jsf:for="newMessage" jsf:required="true">Enter your message:</label>
            <input type="text"
                   jsf:id="newMessage"
                   jsf:value="#{chat.newMessage}"
                   jsf:required="true"
                   jsf:requiredMessage="New message is required."
                   placeholder="Type your message here..."
                   autofocus="true"
            />
            <h:message for="newMessage"/>
            <br/>
            <input type="submit" jsf:id="submit" value="Send NOW" jsf:action="#{chat.send()}">
<!--                <f:ajax execute="@form" render="@form"/>-->
            </input>
            <br/>
            <p id="message">
                <ul>
                    <ui:repeat value="#{chat.messages}" var="m">
                       <li>
                           #{m}
                       </li>
                    </ui:repeat>
                </ul>
            </p>
        </h:form>
    </h:body>
</f:view>
</html>
Build and run the application.
mvn clean package cargo:run
Open a browser and navigate to http://localhost:8080/faces-examples/chat, you will the following screen.
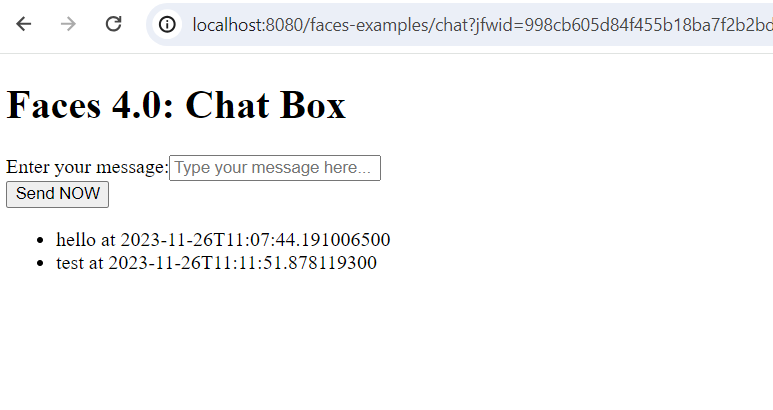
Try to type something in the input box and hit send button, the new message will be appended to in the existing message list.
Open a new tab in the browser and try to access http://localhost:8080/faces-examples/chat again, you will there is a new window for the chat conversation, there is no existing messages, and input some message, you will find a new jfwid in the URL is used for this new window.
When I enabled ajax on the submit button in the view, there is no jfwid param appended to the URL in the browser window, see Mojarra issue 5366
And for those Facelet views written in Java codes, all URL are appended a jfwid param, see Mojarra issue 5365
Input File Component Improvement
The new input file component add two new attributes, accept and multiple.
* The accept can limit the upload file types.
* The multiple="true" allows you to upload multiple files at the same time.
Let's create an example to experience.
Firstly let's have a look at the Facelet view file - inputFiles.xhtml.
<!DOCTYPE html>
<html lang="en"
      xmlns="http://www.w3.org/1999/xhtml"
      xmlns:f="jakarta.faces.core"
      xmlns:jsf="jakarta.faces"
      xmlns:h="jakarta.faces.html">
<f:view>
    <h:head>
        <title>New attribute `accept` and `multiple` in inputFile tag!</title>
    </h:head>
    <h:body>
        <h1>New attribute `accept` and `multiple` in inputFile tag!</h1>
        <h:form prependId="false" enctype="multipart/form-data">
            <label jsf:for="files">Upload files:</label>
            <h:inputFile
                    multiple="true"
                    accept="image/png,image/jpeg,image/gif"
                    id="files"
                    value="#{inputFiles.files}"
                    required="true"
                    requiredMessage="Files is required."
                    placeholder="Choose files from Disk..."
            />
            <h:message for="files"/>
            <br/>
            <input type="submit" jsf:id="submit" value="Upload Now" jsf:action="#{inputFiles.submit()}">
            </input>
            <br/>
            <p>#{inputFiles.uploadedFiles}</p>
            <h:message globalOnly="true" showSummary="true"></h:message>
        </h:form>
    </h:body>
</f:view>
</html>
The backend bean - InputFiles.java.
@Named
@RequestScoped
public class InputFiles {
    private static final Logger LOGGER = Logger.getLogger(InputFiles.class.getSimpleName());

    @Inject
    FacesContext facesContext;

    private List<Part> files;

    private List<String> uploadedFiles = new ArrayList<>();

    public List<Part> getFiles() {
        return files;
    }

    public void setFiles(List<Part> files) {
        this.files = files;
    }

    public List<String> getUploadedFiles() {
        return uploadedFiles;
    }

    public void submit() {
        LOGGER.log(Level.INFO, "uploaded file size:{0}", files.size());
        for (Part part : files) {
            String submittedFilename = part.getSubmittedFileName();
            String name = Paths.get(part.getSubmittedFileName()).getFileName().toString();
            long size = part.getSize();
            String contentType = part.getContentType();
            LOGGER.log(Level.INFO, "uploaded file: submitted filename: {0}, name:{1}, size:{2}, content type: {3}", new Object[]{
                    submittedFilename, name, size, contentType
            });

            part.getHeaderNames()
                    .forEach(headerName ->
                            LOGGER.log(Level.INFO, "header name: {0}, value: {1}", new Object[]{
                                    headerName, part.getHeader(headerName)
                            })
                    );

            uploadedFiles.add(submittedFilename);
            facesContext.addMessage(null, new FacesMessage(name + " was uploaded successfully!"));
        }
    }

}
Build and run the application.
mvn clean package cargo:run
Open a browser and navigate to http://localhost:8080/faces-examples/inputFiles.
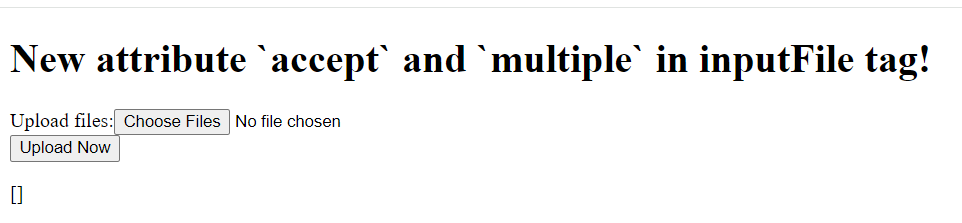
Click the button Choose Files, it will open the system file chooser, which has already filtered the files by type that set in the accept attribute.
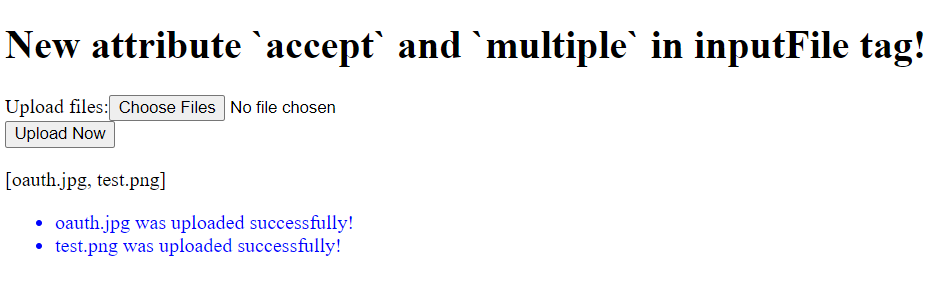
Choose some files, and press the Upload Now button. You wil see the following messages in the screen.
Get the example project from https://github.com/hantsy/jakartaee10-sandbox/tree/master/faces and explore it yourself.